Sharing/Viewing Protected PDF and Image Files with RMS Sharing Application
The Microsoft Rights Management (RMS) sharing application for Windows helps you keep important documents and pictures safe from people who shouldn't see them, even if you email them or save them to another device. This application is also used to open files that are protected by other people using the same Rights Management technology.
If you would like to protect non MS Office document file (e.g. PDF and image) with restricted access permission and share it by email, RMS sharing application can help you.
For more details, please refer to
https://technet.microsoft.com/en-us/library/dn339006(v=ws.10).aspx
Install RMS sharing application
For Office 2013 users, RMS sharing application will be installed silently and automatically to your staff PC.
(Staff may download it directly from http://www.microsoft.com/en-us/download/details.aspx?id=40857 if you are not using a staff LAN PC.)
For Office 2010 users, RMS sharing application needs to be installed manually with the following steps.
- Bring up the Work Desk from your desktop PC.
- Click MS RMS Sharing Application (for Office 2010 Only) and it will start installing Microsoft RMS Sharing Application to your Windows PC.
(Or you may download it directly from http://www.microsoft.com/en-us/download/details.aspx?id=40857)
- Wait for a while and the following "Configure Office 2010" dialog box will be shown.

- Click Next and you will be asked for user credentials.

- Enter your email address in the format "eid@um.cityu.edu.hk" and password. Make sure the options Remember me and Remember my password are checked and click OK.
- The system may ask for your credential for one or two times again, please re-enter your password as prompted and click OK.
- When the configuration finished, the following dialog box will be shown.

- Click Restart to restart your PC.
How to protect a file that you share by email?
To protect non MS Office document file (e.g. PDF and image) with restricted access permission and share it by email:
(Note: PDFs protection can only be done on Windows.)
-
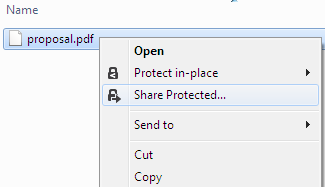
In File Explorer, right-click the file and select Share Protected....
-
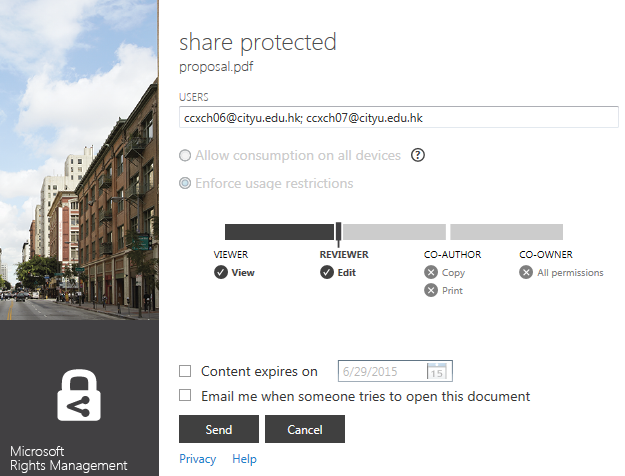
In the share protected dialog box, enter internal recipient email addresses with @cityu.edu.hk domain, specify the options that you want for this file, and then click Send.
-
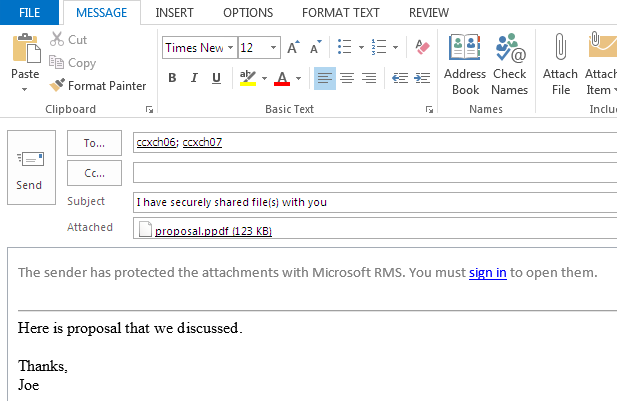
You may quickly see a dialog box to tell you that the file is being protected, and then you will see an email message is created for you that tells the recipients that the attachments are protected with Microsoft RMS.
-
You can change anything that you want in this email. For example, you may include the keyword #classified in the email subject to set the email as confidential for internal recipients.
-
Send the email.
How to protect a file on a device (protect in-place)?
When you protect a file in-place, it replaces the original, unprotected file. You can then leave the file where it is, and copy it to another folder or device. You can also attach the protected file to an email message.
To protect a file on a device (protect in-place),
-
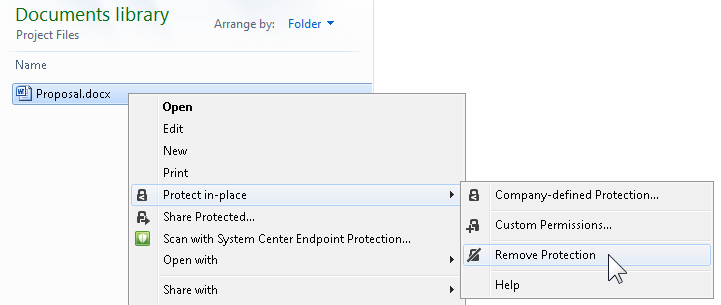
In File Explorer, select a file to protect. Right-click, and then select Protect in-place. For example,

-
Do one of the following:
-
Select a policy template: These are 2 predefined permissions that restrict access and usage: CityU - #classified email and CityU - Read-Only (If this is the first time you try to protect a file on this computer, select Company-defined Protection ... to download the templates first.).
When you select a policy template, you can also protect multiple files and a folder. When you select a folder, all the files in that folder are automatically selected for protection but new files that you create in that folder will not be automatically protected.
-
Select Custom Permissions: Choose this option if the templates don't provide the level of protection you need. Specify the options that you want for this file in the "add protection" dialog box, and then click Apply.
-
You may quickly see a dialog box telling you that the file is being protected, and the focus will then return to File Explorer. The selected file(s) are now protected. In some cases (when adding protection changes the file name extension), the original file in File Explorer is replaced with a new file that has the Rights Management protection lock icon. For example,

If you later want to remove the protection from a file, right-click the file, click Protect in-place, and then click Remove Protection (Note: You must be an owner of the file to remove the protection.).
How to view files that have been protected?
When the Rights Management (RMS) sharing application is installed on your computer, you could view a protected file by simply double-clicking it. The file may be an attachment in an email message, or you may see it when you use File Explorer.
How the file is opened depends on its file name extension. Protected MS Office document files can be opened by Office 2010 and 2013 that are enlightened for RMS. For protected files with .ppdf/.ptxt/.pjpg/.ppng/.pgif/.pfile file name extension, they can be opened by using RMS sharing application.
RMS sharing application is available in various perform, including Windows, Mac OS X, iOS, and Android, but only Windows version can add protection to PDFs.
IT.ServiceDesk@cityu.edu.hk