Microsoft 365 Exchange Online users can set up an Inbox Rule either in Outlook or Outlook Web App (OWA) to filter spam/junk mail. For details of the "Spam Auto-filtering" feature please refer to FAQ "What does the Spam Auto-filtering do?" at http://www.cityu.edu.hk/csc/deptweb/support/faq/email/spamfilter/autofiltering.htm.
Following is the Inbox Rule detail:
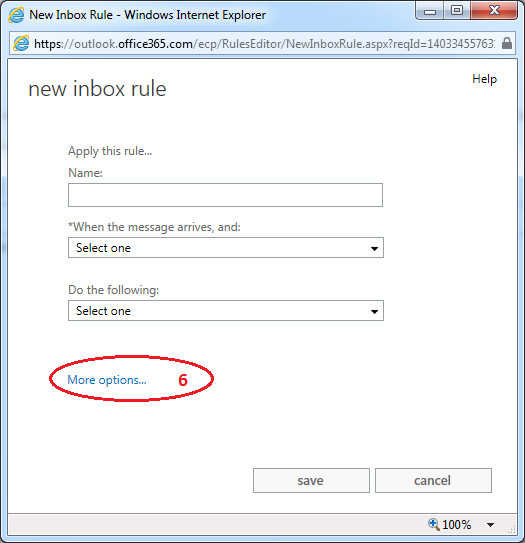
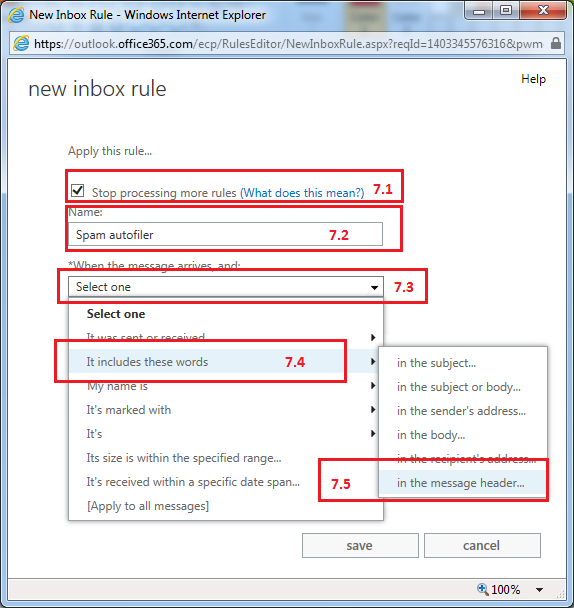
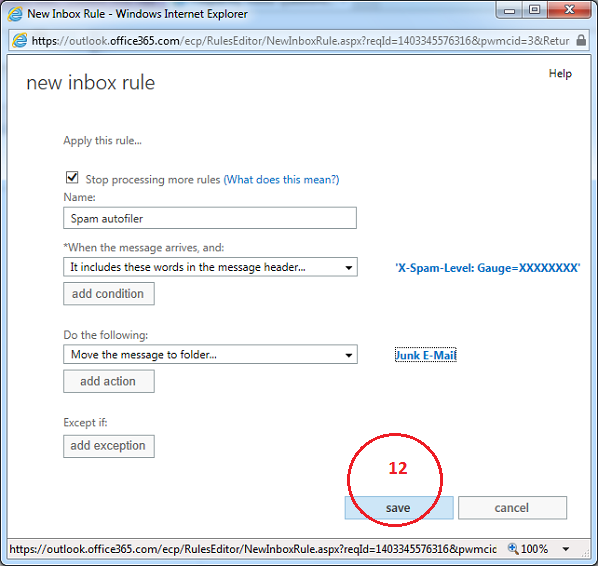
Apply this rule after the message arrives
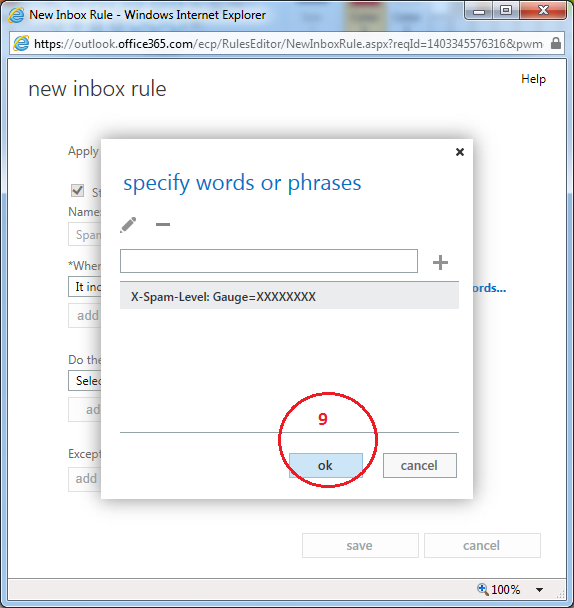
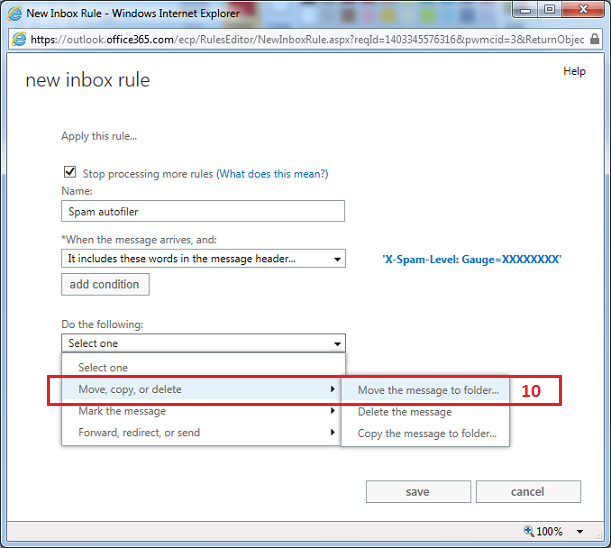
with X-Spam-Level: Gauge=XXXXXXXX
in the message header
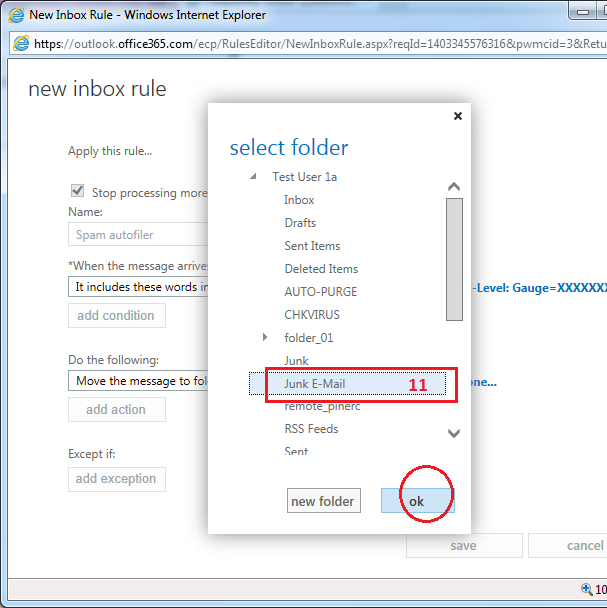
move it to the Junk E-mail folder
and stop processing more rules
The above rule setting will filter email to your specified folder (e.g. the Junk E-mail folder) if the message got X-Spam-Level 80% or higher.
If you want to filter more email, say filter the email when the message got X-Spam-Level 50% or higher, simply
reduce the number of X to 5 in the rule.
i.e. To change condition with X-Spam-Level: Gauge=XXXXX in the message header
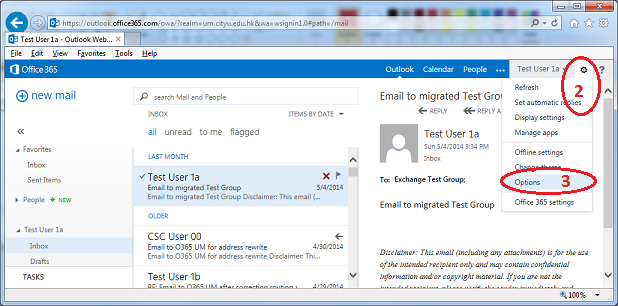
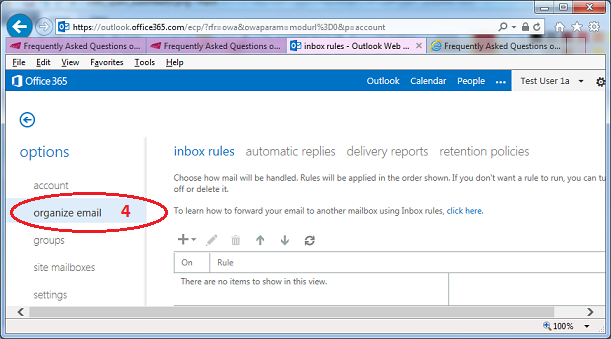
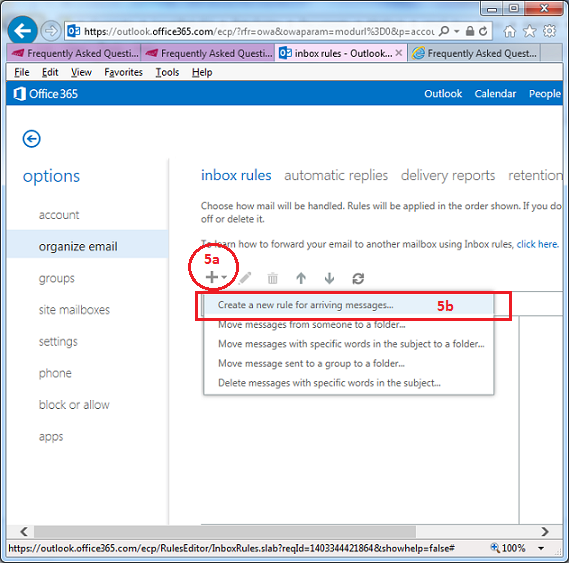
Following is the procedure of creating Inbox Rule for Spam Auto-filtering in your account with Microsoft 365 Outlook Web App (M365 OWA). You can also create similar Rule in your Microsoft 365 account using Microsoft Outlook.

Return to FAQs on CityUHK Microsoft 365
IT.ServiceDesk@cityu.edu.hk