An Essential Archiving and Compression Utility: WinZip 8.1
As more and more files are being shared across the Internet, it is important that their file sizes can be compressed providing shorter downloading / transferring time. Furthermore, files often get corrupted when they are transferred "loose" over Internet lines and therefore a certain kind of protection is required. This is why "zip archives" are so popular. With the help of a compression program, you can zip/compress your own files and send as attachments to email, or upload to a website and offer them (via a link) for others to download and save to their computer. As zipped files are placed within a "container", it protects those files during transmission / downloading.
The award-winning utility, WinZip 8.1, makes it easier to work with zip files and other types of archive files. Archives are files that contain other files, and zip files are the most common archive format. Apart from zip files, WinZip also handles a number of popular and not-so-popular Internet file formats, including TAR, UUencode, MIME, BinHex, CAB and gzip. You do not need to worry if the file being received is UUencoded, XXencoded, BinHex, or a MIME file (base64, plain/text, and quoted-printable). WinZip will detect the method being used and automatically decode it.
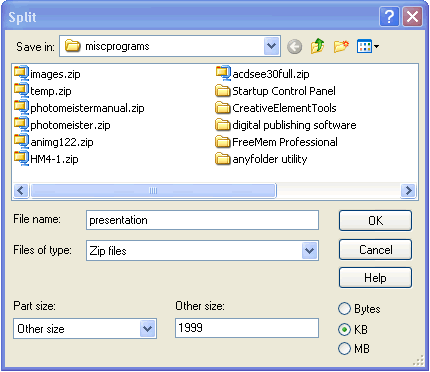
Furthermore, you can get around the problem of email attachment restrictions (or floppy archiving) by using a new Split option to break large files or archives up into multiple components that measure just under your email gateway limitations. If your limit is 2MB, simply specify a 1999KB split, and any troublesomely large file is cut down into identical parts that can easily be reassembled at their destination by another WinZip 8.1 user.
WinZip also provides self-extracting zip files which means that you can send a zipped file to a colleague who does not have an unzip utility to extract the files from it. Use WinZip to create an executable program file (.exe) that is bundled with a zip file and software to extract the contents of the zip file. Your colleague can then run this file just as he executes any other program without using a separate "unzip" utility. Here are the steps:
1. Create a zip file with WinZip (see below).
2. Open the file with WinZip (see below).
3. On the Actions menu, select Make .Exe File.
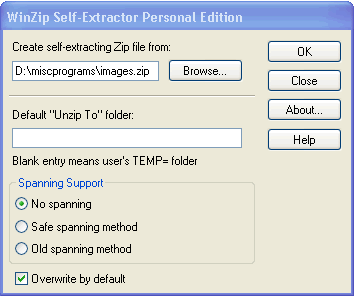
4. Click OK to create the executable .exe file.
So how do we use WinZip to do simple tasks like 'open' or 'create' a .zip archive? If you are not familiar with the steps, the following will definitely help you get started.
Open a Zip Archive
You can open a zipped file in two ways:
Method 1: Find the folder where the zip file resides in Windows Explorer. Double-click on the file. This will bring up the WinZip program.

If you want to place the unzipped file(s) in the same folder as the zip file, even temporarily, you can click on the file(s) in the WinZip window, and just drag them over into a "blank" area of that same folder. WinZip automatically unzips them in the process and it is a very easy and fast way to unzip file(s). Later, you may move the unzipped file(s) to whatever folder you want to.
Method 2: Click on the Open button in WinZip's button bar. Click on the file name and choose Open.
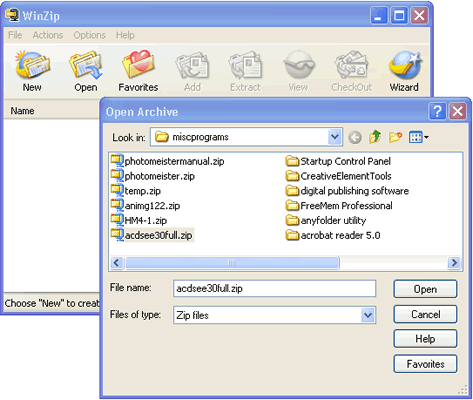
A listing of the files in the selected zip archive will appear.
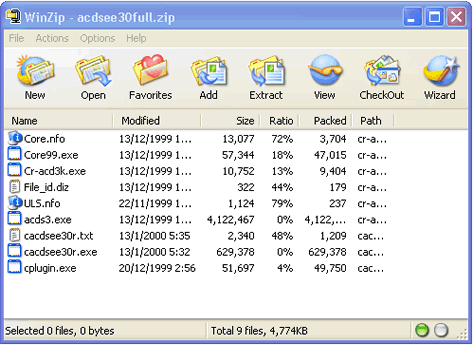
To extract and save these files to a directory on your hard disk, click on the Extract button in WinZip's button bar.
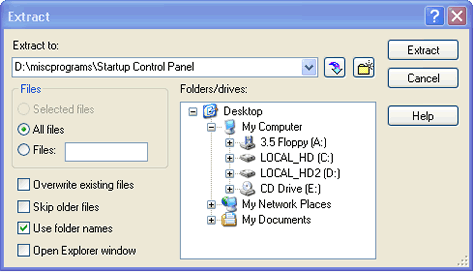
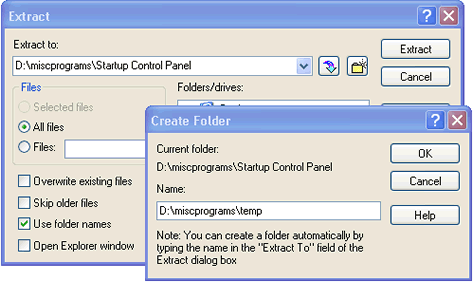
You may select the path and folder in the Folders/drives: window to which you want to extract the files. If you prefer to store them in a new folder, click on the

When you have selected the destination of the extracted files, click on the Extract button in the top right corner of the Extract window. WinZip will extract the files to the specified location.
Create a Zip Archive
To compress a set of files to a zipped archive, click on the New button in the WinZip's button bar. Type a name for the new archive in the File name: box, and click on the OK button.
The Add dialogue box will appear:
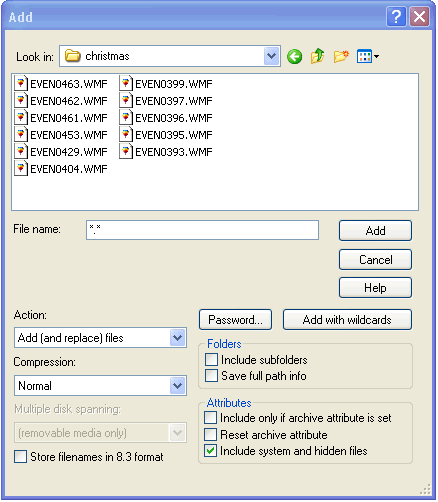
Select the files you want to add to your new archive, and click on the Add button. If you wish to add the entire contents of a particular folder, type *.* in the File name: box provided, and click the Add with wildcards button.
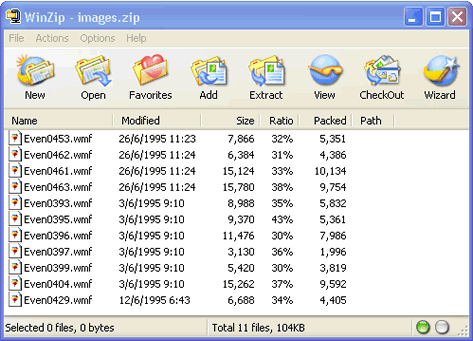
WinZip will display the contents of your new archive file.
You have successfully created a zip file archive. If you want to add more files to the archive, click on the Add button in the WinZip's button bar.
