Virtual Private Network (VPN)
Connection Setup Guide for Windows 7
This manual shows the procedures to set up a CityU VPN Client running on Windows 7. You should have the following items before you can establish a VPN connection.
Step 1: Establish your Internet Connection 1. Since you will need a public Internet connection to
establish the CityU VPN connection, you must first
apply for your own Internet connection (such as broadband, dial-up, etc.). 2. Follow the instructions provided by your ISP to setup your Internet connection. 3. Check your Internet connection by logging in with your ISP account. If you cannot access the Internet or having problems in setting your Internet connection, please consult your ISP. Step 2: Setup the CityU VPN Connection 1.
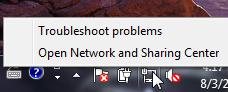
Right click the “computer”
icon in the systray of the task bar (lower right cornner of the screen) and
select “Open Network and Sharing
Centre” option:
2.
Select “Setup
a new connection or network” to create a VPN connection profile:
3. Select “Connect to a workspace”
and then press
the "Next" button:
5. Click the “Use my Internet connection (VPN)” to continue:
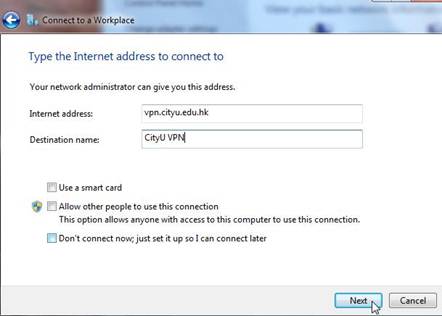
6. You are
now prompted for the name of the VPN Server to which you are connecting.
Enter "vpn.cityu.edu.hk" and “CityU VPN” in the “Internet address” and
“Destination name” boxes respectively. Press "Next"
to continue:
7. Enter the Network Connection Account and password to logon the CityU VPN. . |


8. Upon successful
logon, a secured VPN connection through public network has been established.
9.
You may disconnect the VPN connection or connect again by left click the
“computer” icon in the systray and choose the “CityU VPN” item:
