Quota Controlled Fast Print Queue - free service (Guideline for Mac Users)
(For more information, please refer to Frequently Asked Questions / Policy and Guidelines for this service)
Quota Controlled Fast Print Queue service is provided in Computing Services Centre to enhance the existing quota-based printing service with the following advantages:
- A unique print queue for multiple printers
- Release of print jobs at the most convenient time and location
- Deduction of print quota at printing instead of job submission
- Provision of papers for printing
High performance printers can be found at the following locations:
- Li Dak Sum Yip Yio Chin Academic Building (LI) 4/F (6 Konica Minolta printers)
- Li Dak Sum Yip Yio Chin Academic Building (LI) G/F Room G600 (2 Konica Minolta printers)
- CMC 4/F (2 Konica Minolta printers)
Users can also release their print jobs inside CityU Library at the following locations (the printers are maintained by Library)
- Inside Information Space (2 Konica Minolta printers)
- Inside Printing Rooms of Oval Area (3 Konica Minolta printers)
Users can submit their print jobs through the notebooks anywhere.
- as long as they are connected directly to the WLAN within campus
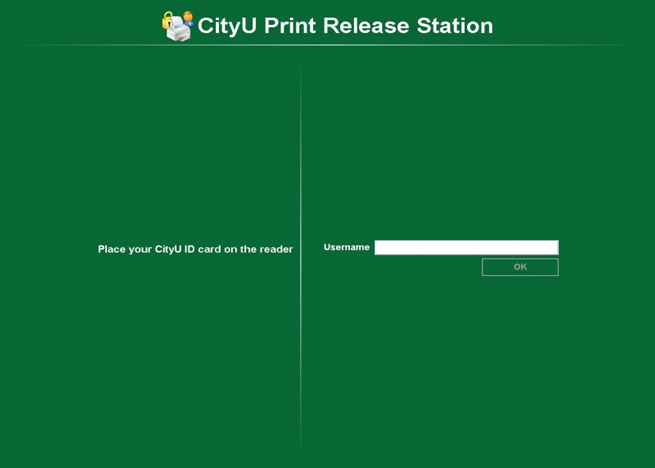
They can then release the print job and pick them up at the release station by using their CityU ID Card.
The print quota will be deducted when user release the print
job.
In order to speed up the central printing system so as to cope with heavy printing demand at the beginning of Semester A, students are strongly recommended not to submit their print jobs until they are ready to be released at the printing station as the performance of central printing system will be seriously affected if too many print jobs are submitted without being released.
ALL submitted print jobs must be released within 1 hour or else they will be deleted automatically and students will have to re-submit their print jobs.
Steps for printing: (For macOS 10.14)
- Add printer for Quota Controlled Fast Print Queue
- Choose System Preferences from the Apple menu.
- Choose Printers & Scanners from the View menu.
- Click the + button to add a printer.
- Press the Control key while clicking the "Default" icon (or any other icon on the toolbar), then choose Customize Toolbar from the contextual menu that appears.
- Drag the Advanced (gear) icon to the toolbar.
- Click Done.
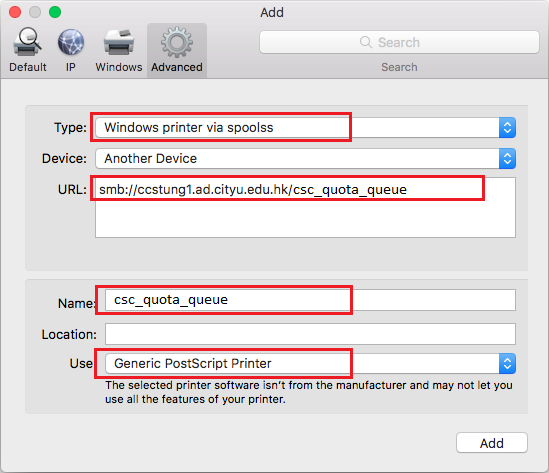
- Click the Advanced icon that was added to the toolbar.
- Choose Windows printers via spoolss from the Type pop-up menu.
- In the URL field, type smb://ccstung1.ad.cityu.edu.hk/csc_quota_queue
- In the Name field, type csc_quota_queue.
- In the Print Using field, select Choose Generic Postscript Printer.
- Click Add.
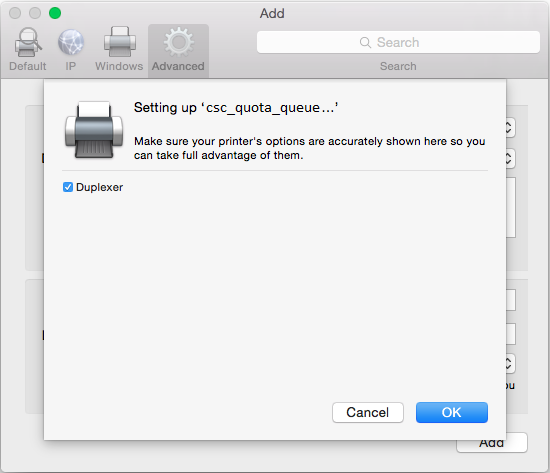
- Tick the Duplexer checkbox, then click OK.
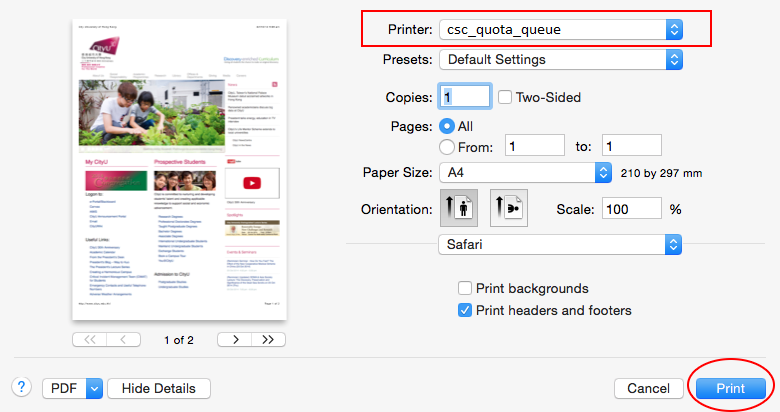
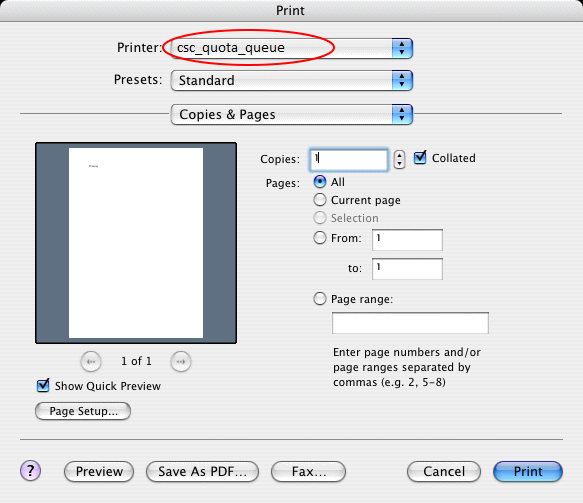
- Print to the print queue in your application
(Choose "csc_quota_queue")
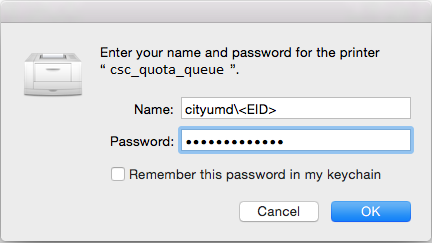
Mac will prompt for your name and password. Please choose "Registered User" and enter your name as "cityumd\<EID>" and then your password. (where <EID> is your EID)
Go to Step 3 for the procedures of releasing print jobs at Release Station.
Steps for printing: (For Mac OS X 10.9 or below)
-
Add printer for Quota Controlled Fast Print Queue
(Followings are the setup steps for Mac OS X 10.8. The steps will be different for different versions of Mac System)
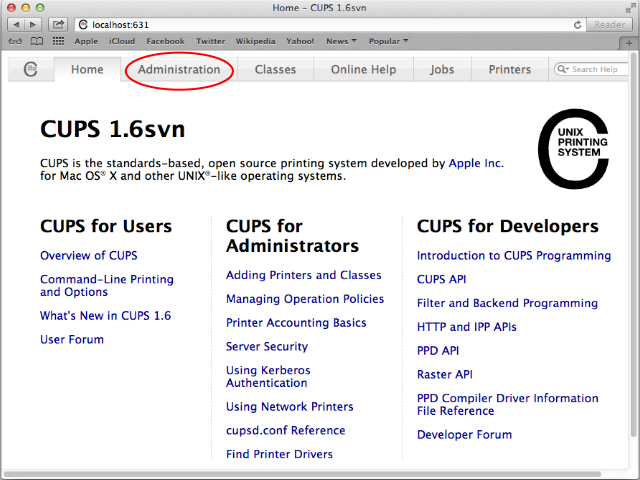
- Go to http://localhost:631 through Safari
- Select "Administration" in the top menu
- Click "Add Printer"
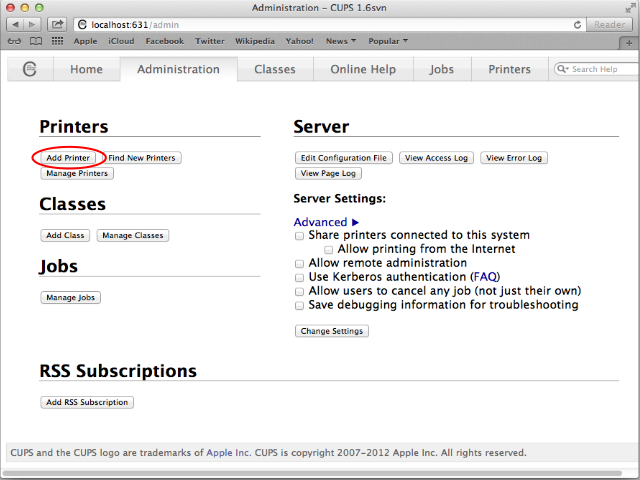
- Authenticate if requested
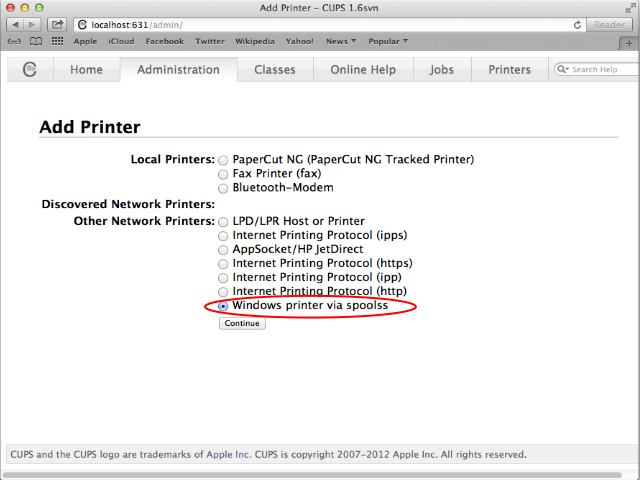
- Select "Windows printer via spoolss" and press "Continue"
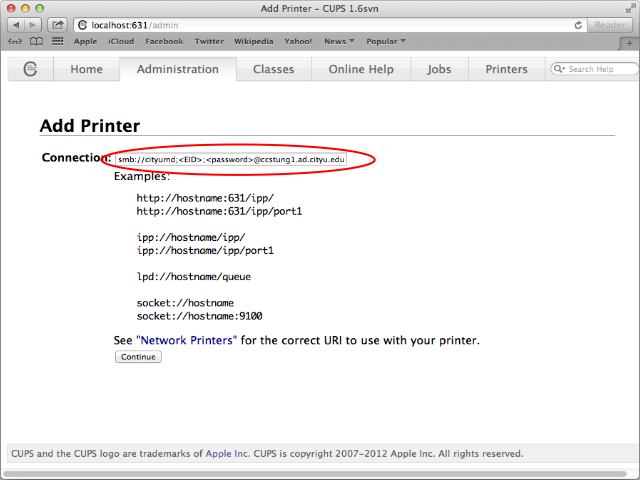
- Type "smb://cityumd;LOGIN:PASSWORD@ccstung1.ad.cityu.edu.hk/csc_quota_queue" in the "Connection" field and press "Continue" (replace LOGIN with your EID and PASSWORD with your password)
- Type a name in the "Name" field, for example csc_quota_queue and press "Continue"
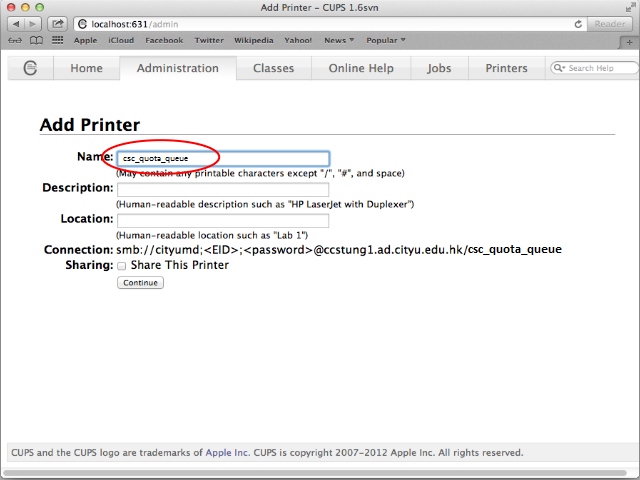
- Select "Generic" as the printer manufacturer from the "Make" list and press "Continue"
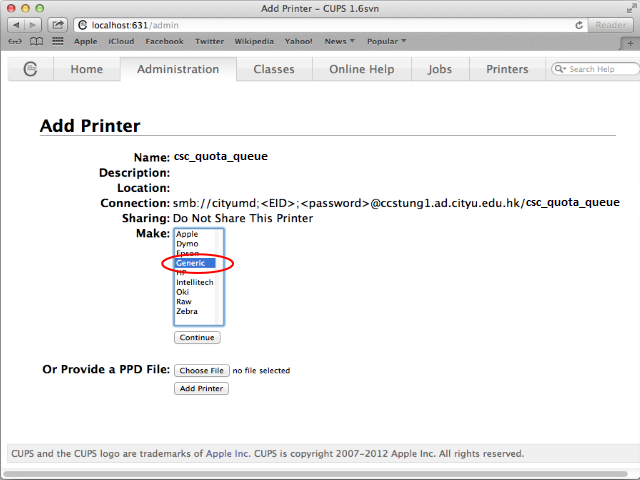
- Select "Generic Postscript Printer" as the printer model from the "Model" list and press "Add Printer"
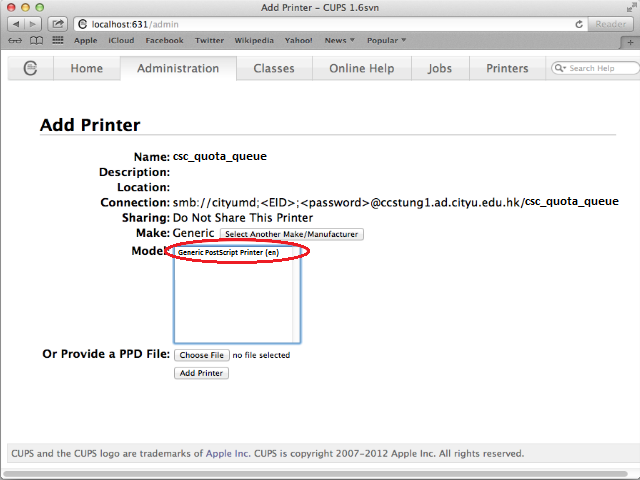
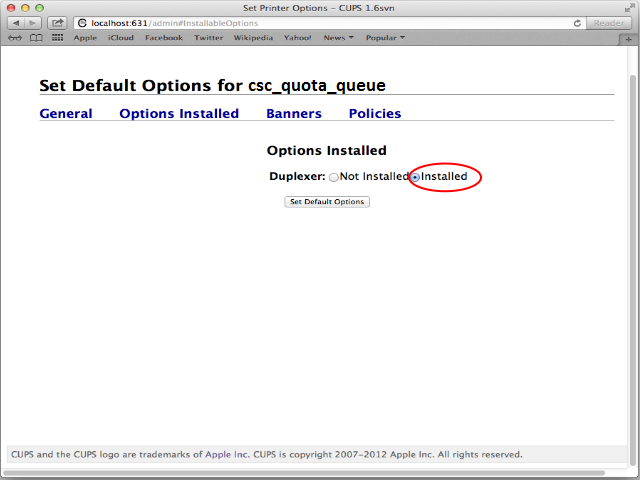
- Set the "Media Size" to A4 and then click "Options Installed"
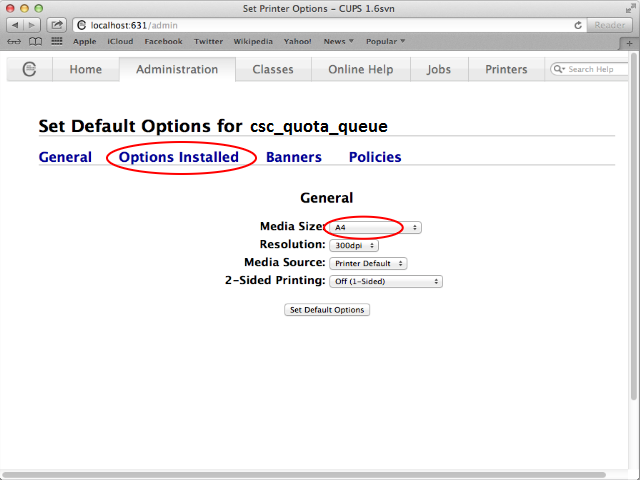
- Set "Duplexer" to "Installed" and press "Set Default Options"
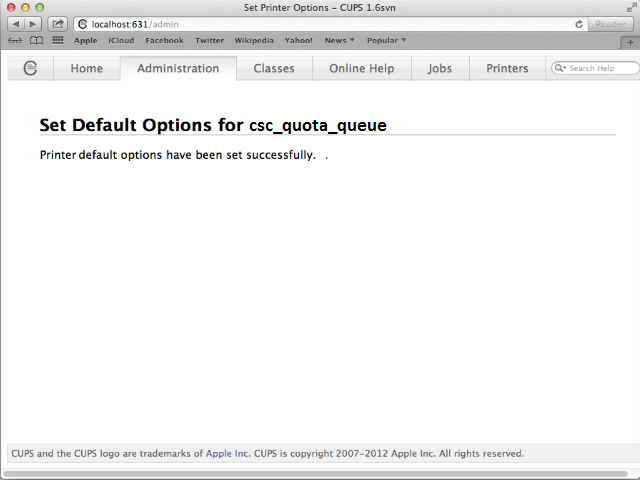
- "Printer default options have been set successfully" will be shown
- Print to the print queue in your application
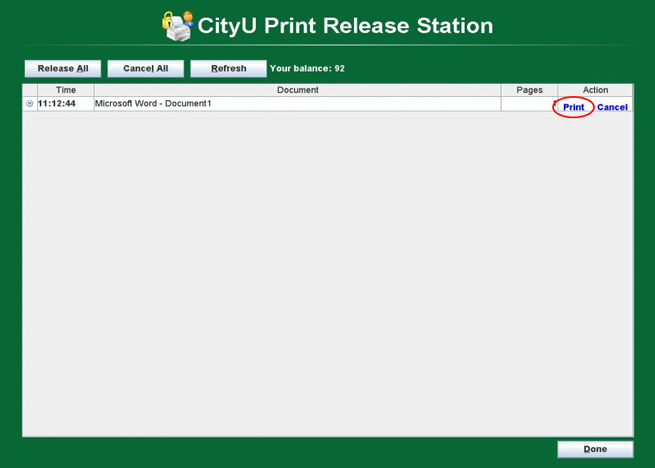
- Go to the Release Station, place your CityU ID Card on the smart card reader
- Click "Print" on the job you want to release
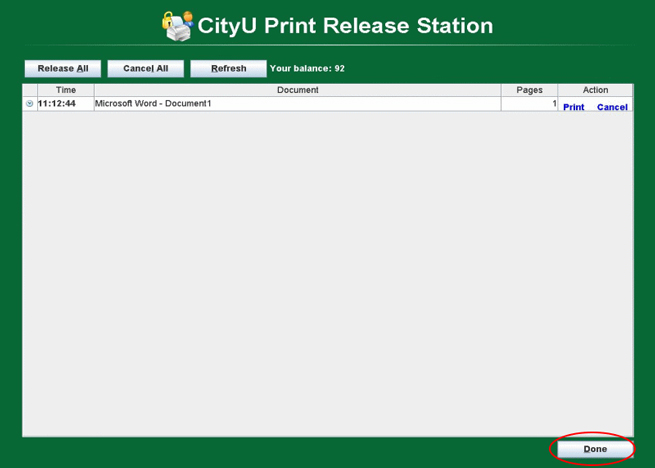
- Click "Done" to exit
IT.ServiceDesk@cityu.edu.hk


