How to set up Spam Auto-filtering on Microsoft 365 Exchange Online?

Microsoft 365 Exchange Online users can set up an Inbox Rule either in Outlook or Outlook Web App (OWA) to filter spam/junk mail. For details of the "Spam Auto-filtering" feature please refer to FAQ "What does the Spam Auto-filtering do?" at http://www.cityu.edu.hk/csc/deptweb/support/faq/email/spamfilter/autofiltering.htm.

Following is the Inbox Rule detail:

     Apply this rule after the message arrives
     with X-Spam-Level: Gauge=XXXXXXXX in the message header
     move it to the Junk E-mail folder
     and stop processing more rules

The above rule setting will filter email to your specified folder (e.g. the Junk E-mail folder) if the message got X-Spam-Level 80% or higher.

If you want to filter more email, say filter the email when the message got X-Spam-Level 50% or higher, simply reduce the number of X to 5 in the rule.
i.e. To change condition with X-Spam-Level: Gauge=XXXXX in the message header

Following is the procedure of creating Inbox Rule for Spam Auto-filtering in your account with Microsoft 365 Outlook Web App (M365 OWA). You can also create similar Rule in your Microsoft 365 account using Microsoft Outlook.
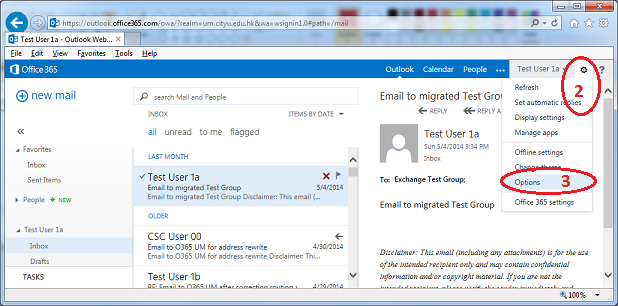
  1. Login M365 OWA at Microsoft Sign in to Microsoft 365 web page.
  2. Click gear icon at the top-right corner of OWA window.
  3. Select Options.

    See All Options


  4. (Note: Microsoft has recently changed the look of Options in OWA. If you find that the screen displayed after selecting Options is unlike the following screens, please click OTHER, then click the link "Go to the earlier version".)

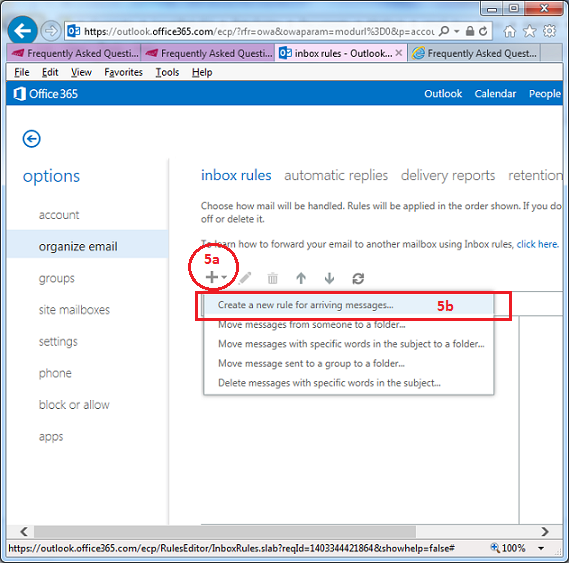
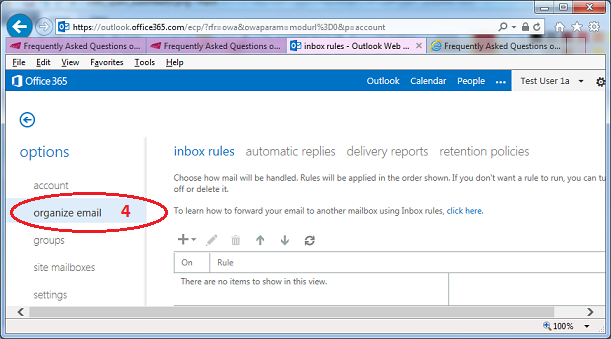
  5. Select organize email

    Select organize email

  6. Click + , the select "Create a new rule for arriving message...".

    Create a new rule

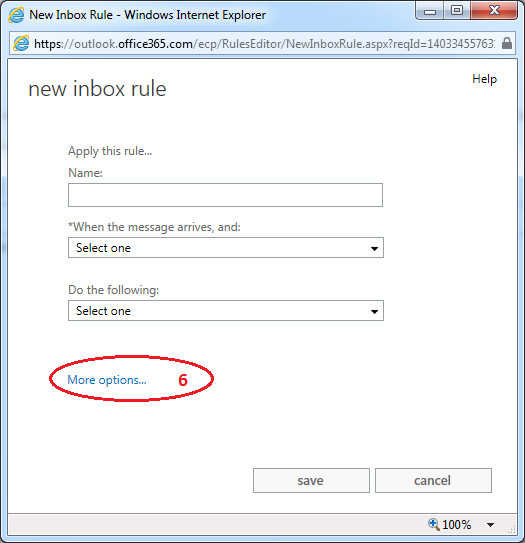
  7. Click More Options...

    Click More Options

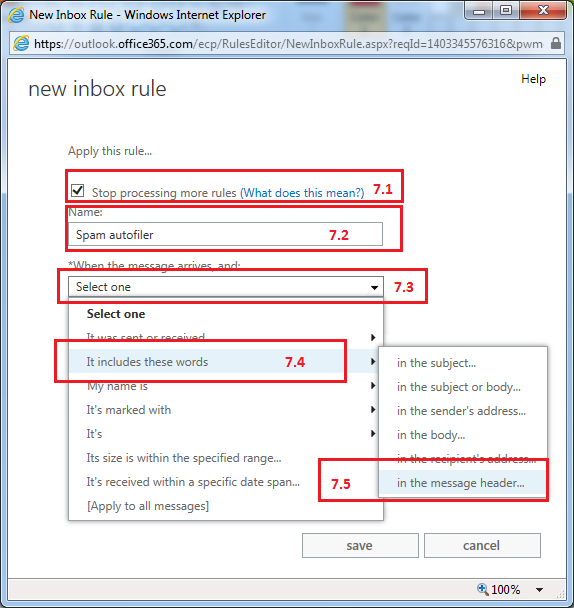
  8. In the new inbox rule windows:
    1. Select the check box Stop processing more rules
    2. Specify the name of the rule (e.g. Spam autofilter)
    3. Click Select one under "*When the message arrives, and:"
    4. Select It includes these words
    5. Click in the message header...

    Specify Rule Conditions

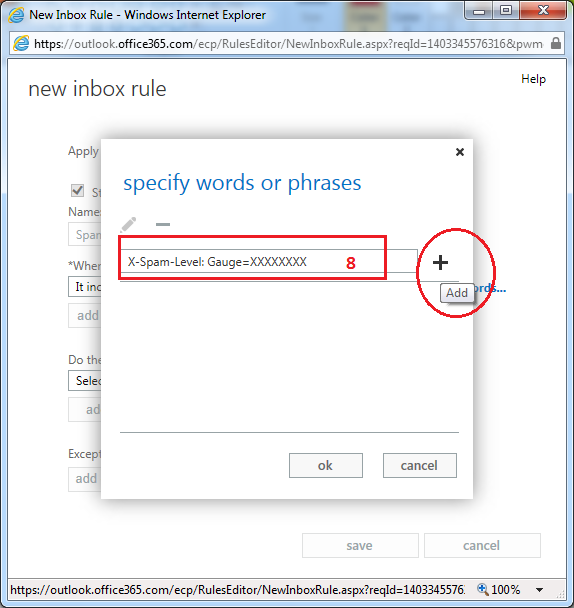
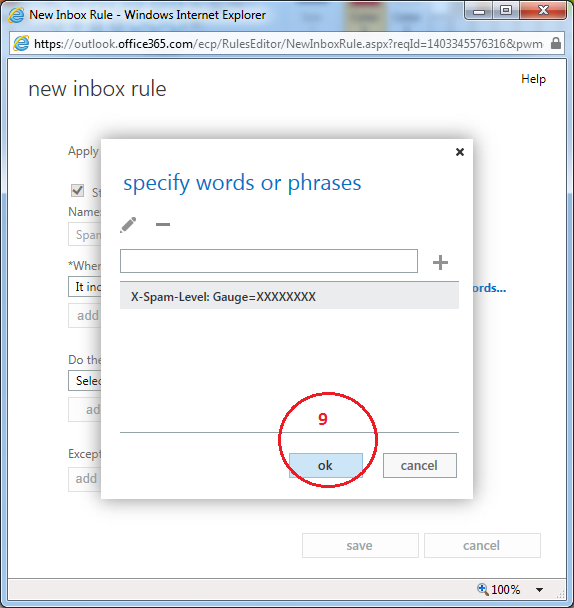
  9. Type X-Spam-Level: Gauge=XXXXXXXX in the specify words or phrases dialog box, then click + to add the phrase.

    Specify Spam filter Level

  10. Click ok

    Save Spam filter Level

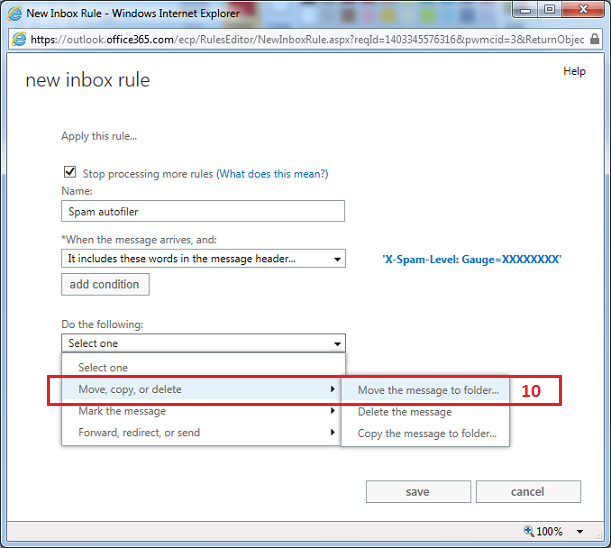
  11. Select Move, copy, or delete and then click Move the message to folder...

    Select Action

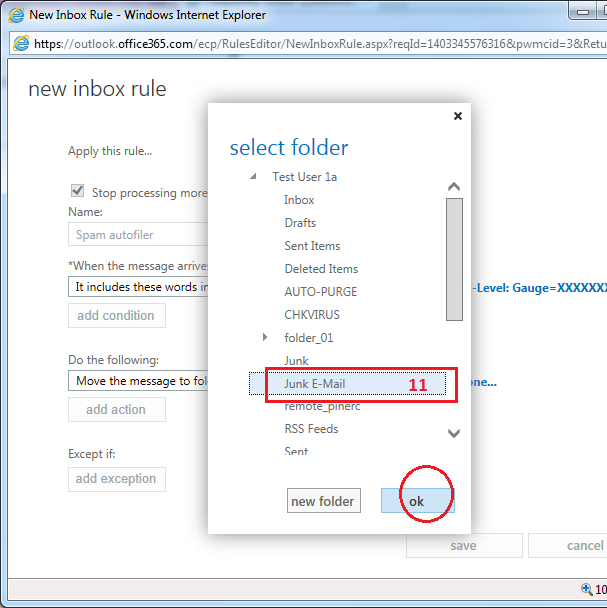
  12. Select Junk E-mail folder and then click ok.

    Select Folder

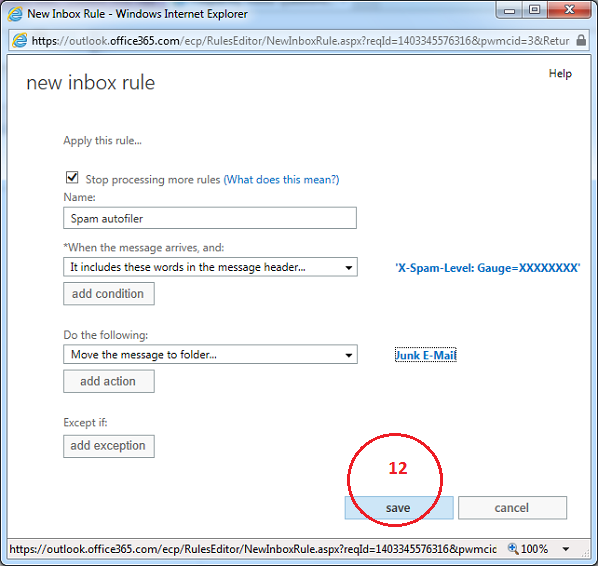
  13. Click save.

    Save Rule Settings


Return to FAQs on CityU Microsoft 365

IT.ServiceDesk@cityu.edu.hk